


Document Actions
gvSIG-Desktop 1.10. User Manual
The tool for exporting the view as an image can be accessed from the drop-down toolbar by selecting "Export to raster" on the left button and "Save view to georeferenced raster" on the right button. Make sure that the name of the raster layer that you want to export is set as the current layer in the text box.

Export to raster. Save view to georeferenced raster
A message will appear to inform that you can use the selection tool to set the area in the view to export.
You can begin to select a area on the view
Now, you can select two points in the view to define the rectangle of the area to be exported, by clicking the first point and dragging the mouse towards the second point, then release.
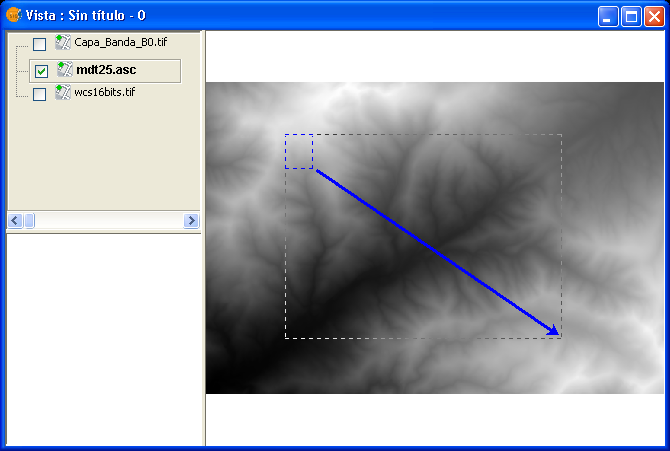
Selection of a rectangle to define the output image
Then, the Save view to georeferenced raster dialog will appear. If the selected area is too small, the dialog will not appear and a bigger rectangle must be selected.
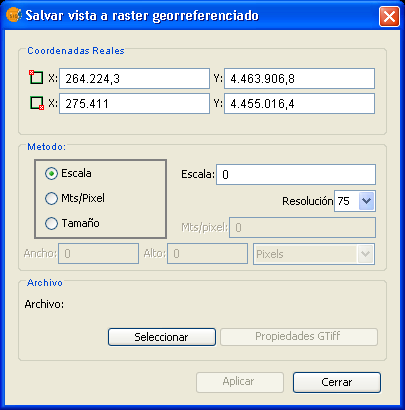
Save view to georeferenced raster dialog
The upper part of the Save view to georeferenced raster dialog shows the coordinates of the two points that define the selected area in the view. You can edit the coordinates to change the selected area.
In the option box in the central part of the dialog you can choose from three selection methods:
- Scale. Selecting this option will enable the Scale textbox and the pull-down box "Spatial resolution" which refers to the resolution in points per pixel (ppp) of the exported image. When entering a value in the Scale textbox and clicking enter, the values "Mts/pixel" and the size (Width and Height) will be recalculated for the output image.
- Mts/pixel (Meters per pixel): When selecting this option, the "Mts/Pixel" textbox is enabled. When you enter a value in the Mts/Pixel textbox and press enter, the values for "Scale" and size ("Width" and "Height") will be recalculated automatically for the output image.
- Size: When selecting this option, the text boxes to enter the "Width" and "Height" will be enabled. When you enter one of these values, the other will be calculated automatically to preserve the right proportions of the image. The other data ("Mtx/Pixel" and "Scale") will also be recalculated automatically. By default, the Width and Height values are displayed in Pixels, but you can select the units (Pixels, Cms, Mms, Mts, or Inches) in which you want to see these values.
NOTE: To save time and memory the maximum size of output images is limited to 20000 x 20000 pixels. If the intended output image is larger and you click on "Apply", gvSIG will display a message that the parameters must be changed before trying again.
Clicking the "Selection" button will open a file browser dialog where you can specify the output file. Depending on the type of file, the corresponding driver will be loaded (you will notice that the button on the right of the "Selection" button will change). For example, an output file .jp2 will open the properties dialog for Jpeg2000. The formats in which you can save are .TIF, .IMG, .BMP, .PGM, .PPM, .MPL, .RST, .JP2, .JPG, and .PNG. Furthermore but only on Linux kernel 2.4 you can also select ECW.
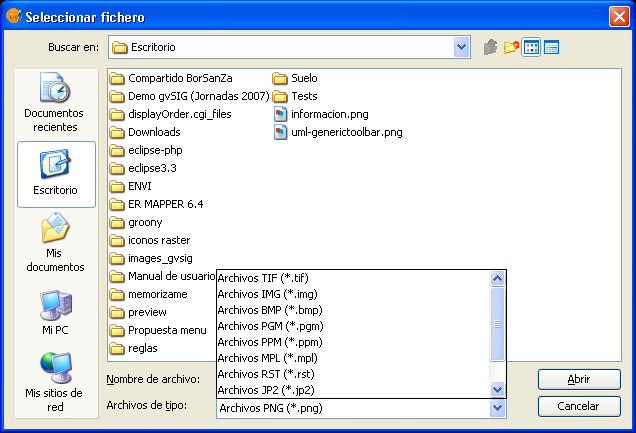
File browser dialog to save the output image
When you select the output file, the Properties button will be enabled.
For example, for geoTiff the dialog will look like this:
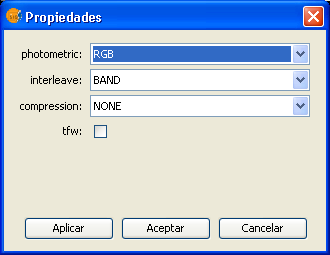
Properties geoTiff
- Photometric: [MINISBLACK | MINISWHITE | RGB | CMYK | YCBCR | CIELAB | ICCLAB | ITULAB]. This assigns the photometric interpretation. The default is RGB, as the input image consists of 3 bands of the Byte data type.
- Interleave: [BAND | PIXEL]. By default, tiff files are interleaved by band. Some applications only support interleaved by pixel, in which case you can change this option.
- Compression: [LZW | PACKBITS | DEFLATE | NONE] This refers to the data compression. The default option is NONE.
When the output image is selected and the properties set, you can click on "Apply". A progress bar will appear. Depending on the size of the output file, this process may take while. Processing times may vary between a few seconds or several days, so it is important to check the size of the output image in pixels before clicking "Apply". When finished, a screen with statistics will appear that indicates the path of the output image, the disk size, the duration of the process and whether it was compressed. To check the georeferencing of the output image, you can add it to the view as a new layer with transparency.
Cached time 11/21/13 07:11:06 


